Tuesday, February 17, 2015

Repairing an old boat ladder

Last summer the plastic rungs of my boat ladder snapped in half, leaving us unable to go swimming.  With nothing to do this winter I figured it'd be a good time to repair it.


I didn't intend on starting a blog when I did this project so it will be missing some pictures

Three of four steps had cracked in two, leaving me one good piece to use as a model.  I initially thought I could drill out the plastic through rods that held the steps in place, but it was difficult to square up perfectly.  In the end I was able to cut between the side grooves with a utility knife, and either pushed or drilled out the smaller pieces.  I then took the intact step to lowers and bought stainless bolts, washers, and locknuts.

From there I took my last remaining step and got lengthXwidthXdepth dimensions.  Conveniently, my grandfather makes furniture and has a wood shop.  I knew I wanted to use a hardwood for this project and he happened to have a lot of cherry in stock.  We planed our boards down and cut them down to size.  Afterward, we used the model piece and a drill press to drill out the bottom of the step grooves.  I recommend undersizing the bit.


We put a stop block behind a band saw that was measured out to the bottom of the step grooves.  You can make 4 cuts per step before having to readjust the band saw.  It worked really well.

Once notched out, I recommend rough fitting them into the grooves and adjusting the cuts from there.  When you're all done you can clean up the grooves with a file and sandpaper.

With the grooves complete we needed to angle the ends.  This was accomplished by lining up the old step and drawing the angles in pencil.  The sander takes care of the rest.

From there I used a drill press to drill the pin holes


Then I checked the fitting.


With the steps cut out and mostly complete, I measured out some anti-skid grip tape, cut it to size, and aligned it in the center of each step.  

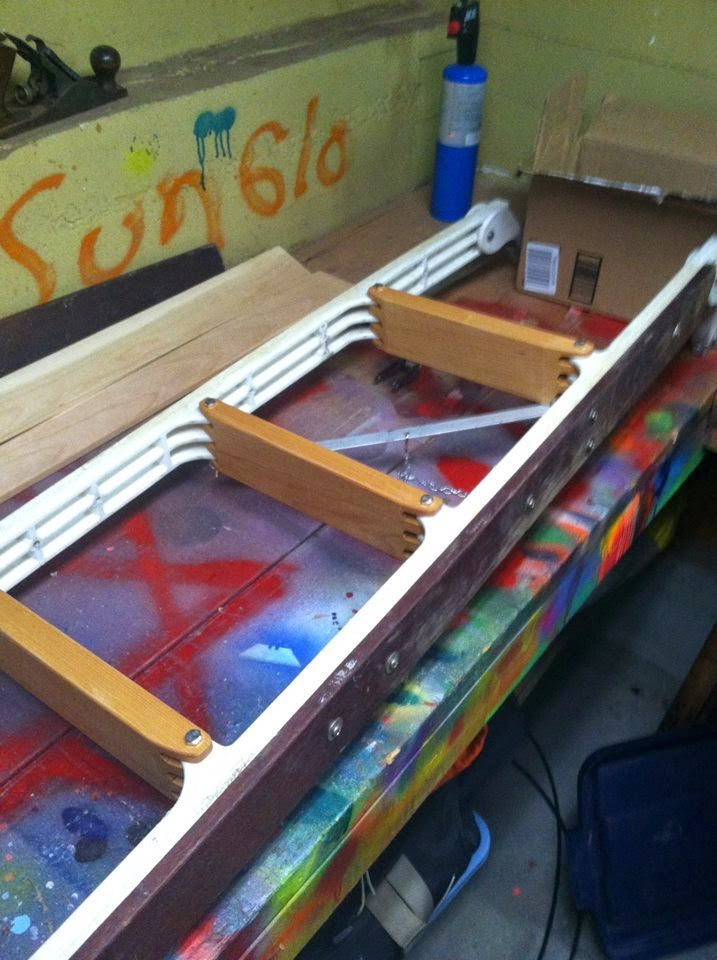
That night I varnished them (right over the tape too) and mounted them in the morning.  They Looked good but I wasn't happy with the old siding no longer matching.  I also used a piece of aluminum to make a stabilizing crosspiece.  It's secured with wing nuts and a chain secures it to some existing hardware (So I don't loose it on the bottom of the lake.)

Here it is from the back.

Before leaving back to my house, we cut and planed some new sides out of cherry.


Removed the sides with hand tools being careful to save the old hardware.
The old side rails worked great as a drilling guide


I then made sure the new rails would fit.
Time for varnish.  I used 180 grit sandpaper to rough it up.

And now with the varnished sides back on.  I could still add a few coats, but my basement isn't ventilated enough and it's too cold to varnish outside.  May hit it again in the spring.  The last remaining thing is to mount some blocks and put a rub guard on where it will hit the boat.  I'll also tackle that in the spring, for now it's done.

Figment

Last summer, with a friend, I purchased a 28' boat from the 70's.  She's a Ranger 28 from 1976, and prior to her purchase, we both had little to no sailing experience.  Despite that minor setback, we learned how to use her via youtube, and hit lake Champlain every weekend we were able.  It was a great summer.


Now I'm looking to get her in better than new shape, and will post my projects to here.